

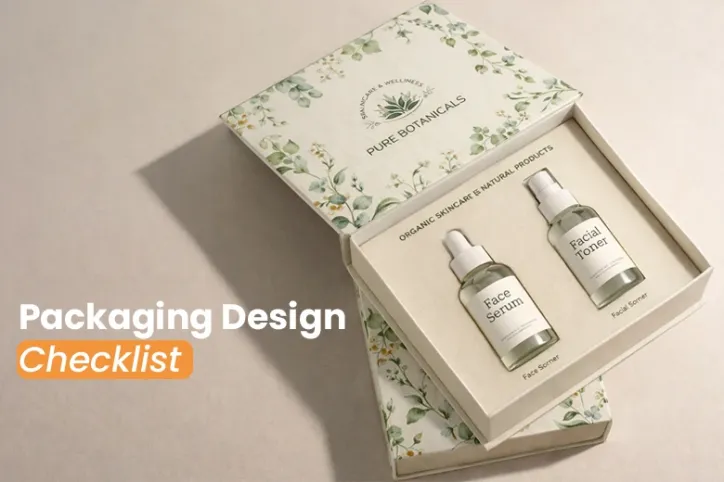

Designing packaging is not just about making a box look good. It is a structured process that balances branding, protection, cost, compliance, and functionality.
When you understand and follow a clear sequence, you avoid expensive mistakes and production delays. Below is a detailed guide, section by section, so that you can move through each phase with clarity and confidence.
Phase 1: Define the Purpose and Requirements
1. Clarify the Packaging Objective
Before designing a package, take a moment to define its purpose. Start by understanding where it will be used, whether on retail shelves, for e-commerce shipping, or both.
Decide if the priority is branding, promotion, or product protection, so every design choice supports the main objective from the start. Although safety is mandatory in every aspect, the other goal should be straightforward.
Clarify whether the product falls into a premium, mid-range, or budget category and who the target customer is.
Finally, determine if the packaging is meant to be displayed or mainly shipped. Following these steps results in a transparent brief that keeps the design focused and practical for custom packaging.
2. Understand the Product Inside the Box
Packaging must be designed around the product, not the other way around. Measure the product dimensions precisely so that you can design custom packaging that fits.
Assess the fragility level on a scale from low to high. Determine whether the product is temperature-sensitive or requires special handling.
Consider the fact that not every box is made for every product. For instance, small luxury items require precise internal sizing.
When defining jewelry box dimensions, accuracy is critical, as even a few millimeters can affect insert fit and product stability.
3. Define the Packaging Type
After measuring the product dimensions in L x W x H format, choose the correct box style based on product requirements and usage. Simplify it like
- Folding cartons are best suited for lightweight retail products.
- Shipping boxes work well for delivering heavier items.
- Rigid boxes are often used for luxury products and premium packaging.
- Mailer boxes are ideal for e-commerce packaging.
This list of custom packaging options goes on, and each serves a different purpose. Document the reason for selecting a particular style. This ensures the choice is functional and not just for aesthetics.
Phase 2: Structural Design

1. Finalize Box Dimensions
Once you have gathered all the relevant details about the product, the next step is to finalize the box size. This stage primarily focuses on the structure and fit.
Begin with the exact product dimension and add reasonable space for custom inserts and packaging fillers.
The box should allow easy placement and removal without squeezing the product or leaving unnecessary gaps. A well-fitted product improves both protection and presentation.
Here, the best type of insert is EVA foam, which can be die-cut to fit your product. If inserts are part of your design, their thickness must be included in the internal dimension measurements.
Ignoring the additional space for the inserts can lead to tight-fitting issues when you place your products inside.
2. Choose Material and Thickness
Once the internal and external dimensions of your box are confirmed, the next decision is selecting the right material and its thickness.
This is important because it directly affects durability, print quality, cost, and how your brand is perceived. Choose materials based on product weight and where it will be used.
- SBS paperboard (12 pt, 14 pt, 18 pt)—Smooth surface, ideal for high-quality retail printing, and also known as cardboard in the market.
- Kraft board (14 pt, 18 pt)—Natural look, suitable for eco-focused or minimalist branding
- Corrugated board (E flute, B flute, C flute)—Added strength and cushioning for shipping and heavier items. The number of flutes can be customized according to your needs and product requirements.
- Rigid board (800 gsm to 1600 gsm)—Thick, solid structure used for premium or luxury packaging.
The thickness should be increased according to the protection you are willing to provide to your product. Lightweight items may only require thinner paperboard, like retail boxes. While fragile or high-valued products often need thicker and denser materials. For example, premium perfumes, jewelry pieces, or even gourmet treats can be packed inside magnetic closure rigid boxes or even drawer boxes that provide utmost protection and also look good. At this stage, when you have decided on the dimensions, materials, and their thickness, you can now think about how you will decorate them.
If you want a deeper understanding before deciding, check our packaging material options guide.
3. Create Die-Cut Template
Understanding dielines and templates in packaging is another crucial step to ensure your packaging appears as you have planned.
A template is a more complete design guide that includes the die line plus the artwork or graphics. It shows exactly how the finished packaging will look after folding and assembly.
Whereas a die line is the outline or blueprint that shows where a package will be cut, folded, or scored. It’s essentially the “cutting map” for a packaging manufacturer. Your designer should create a die-line that includes:
- Cut lines define the exact edges where the box will be cut
- Crease lines indicate where folds will occur for easy assembly
- Bleed area—extra space beyond the cut line to avoid unprinted edges
- Safe zone—area inside the crease lines where text and graphics should remain
Make sure that you have checked these factors for more accurate and cleaner results.
- Ensure no text or important graphics extend beyond the safe zone
- Maintain at least 3 mm of bleed to account for trimming variations
- Clearly mark fold directions to guide assembly
When you have die lines and templates on hand, you can order custom packaging boxes in bulk with confidence. This is due to preplanned packaging that reduces production errors, protects artwork, and ensures the final box folds and assembles easily and perfectly.
If you need ready-to-use layouts, explore our free dieline templates to simplify your design process.
Phase 3: Visual Design
1. Define Brand Identity Elements
Once the structure and all the technicalities are set, the next focus is on how to make your box look appealing. Packaging should reflect your brand in the most appropriate way, like an effective marketing tool. This kind of brand asset is essential before you begin with the final layouts.
- Logo in vector format (AI, EPS, or SVG) for crisp, scalable printing
- Brand colors are specified in CMYK codes to maintain color accuracy in print
- Brand fonts for headlines, body text, and any messaging
- Tagline, if applicable, to reinforce brand messaging
To ensure quality prints and readiness, know the difference between RGB and CMYK color modes. For prints, you can use RGB; however, before printing, make sure to change it to CMYK, since print colors differ from digital screens and printers use CMYK.
Make sure that your images and graphics have a minimum resolution of 300 DPI to avoid pixelation.
2. Layout Design Placement
When we talk about a box, its panels are the different sides: front, back, and sides. How you place your logo, product name, product information, or other details on these panels makes a big difference in how your packaging looks and how easy it is for customers to recognize it.
The placement of each artwork, when placed according to its value, will deliver more professional results. For example,
- Front panel (the side customers see first): Put your logo, product name, and the main content that you want your customers to read first here.
- Side panels: Use these for extra details like features, instructions, or some subtle branding patterns.
- Back panel: Add product info, ingredients, or a barcode/QR code for scanning. You can also add certifications for added information if required.
Arranging elements thoughtfully helps your box look clean and professional and makes it easy for people to recognize your product at a glance. It also communicates your brand and your values.
3. Choose Color Scheme
Start by prioritizing your brand colors by integrating them into your packaging. They should be clearly seen and dominate the design for a consistent look. At the same time, avoid overloading the box with too many colors, as this may create a fuss.
Stick to three or four colors to ensure a clean and focused look that does not overwhelm the eye. Contrast is another key consideration here. But how exactly can you play with your dedicated color palette?
Well, you can make sure that your text stands out against the background so that product names, benefits, or instructions are easy to read.
Also, think about how the color will appear on the material you have chosen. For example, a shade that looks bright on a digital screen may appear muted or dull on Kraft board, but the same shade will appear brighter on SBS paperboard.
So, always test or visualize the colors on the actual surface before printing in bulk. A well-thought-out color scheme not only strengthens your brand but also makes your packaging visually appealing. Otherwise, you can also consider a packaging box with full-color printing in subtle tones, with the artwork or text in the same palette. Sounds boring, right?
4. Select Printing Method
Once your colors and layouts are ready and you have already prepared your packaging template digitally, it is time to decide how your design will be printed.
The printing industry has evolved significantly, bringing about some truly innovative packaging printing techniques. So the method you choose will affect both appearance and cost. It is important to pick the right one for your order size and material.
- Digital printing: Best for small runs or customized designs. Offers vibrant colors and quick turnaround without large setup costs.
- Offset printing: Ideal for bulk orders. Provides consistent high-quality results across thousands of boxes.
- Flexographic (Flexo) printing: Works well on corrugated materials. Handles rough surfaces while keeping colors sharp.
Phase 4: Finishing and Special Effects
1. Decide Finishes
After printing is finalized, finishing adds the final layer of refinement. These details influence how the packaging feels in the hand and how it instantly catches the eye when placed.
The right finish should support your brand positioning rather than overdesigning the packaging and ruining its overall appeal. You can choose matte lamination, which creates a smooth, subtle surface that looks classy.
It reduces glare and gives a modern, understated look. Gloss lamination enhances color vibrancy and adds shine, making graphics appear sharper and more eye-catching. Do you know what looks even more intriguing?
Spot UV. When you want to highlight a specific area, such as logos or product names, by adding a raised glossy effect over selected parts of the design, if you highlight a specific part and add the matte effect, it is called blind UV, which also looks aesthetic and graceful.
Another trendy yet creative finish is foil stamping with gold, silver, and bronze metallic accents, which upgrades premium packaging.
Embossing or debossing adds texture by raising or pressing design elements into the surface. Each finishing option should be chosen carefully to align with the product’s market position.
2. Plan Inserts or Protection
Not every product can simply be placed inside a box without additional support. If the item is fragile, valuable, or has multiple components, inserts become necessary to keep everything secure and organized. In some cases, packaging filler also helps, especially for shipping. Common insert options include:
- EVA foam insert—provides strong cushioning and is ideal for delicate or high-value products
- Cardboard insert—cost-effective and suitable for lightweight retail items
- Molded pulp tray—an eco-friendly option that offers structured support
- Corrugated divider—useful for separating multiple items within one box
When selecting an insert, confirm that it fits perfectly inside the box and matches the internal dimensions. The product should sit firmly in place without tilting or shifting, especially when handled roughly.
There should be no unnecessary movement that damages the product once the box is closed. Proper internal support protects the product during shipping and when it is presented as a gift.
Phase 5: Compliance and Practicality
1. Check Legal and Labeling Requirements
Before moving to production, review all legal and labeling requirements based on the product category and target market.
In simple terms, the information essential to the end consumer should be written and prominently displayed. You can use custom stickers to make your packaging more appealing while communicating the information.
- Ingredients list—if someone is allergic to a certain food item, they will be notified and avoid that item.
- Safety warnings—in some countries, there are signs of halal that are concerning for some religions.
- Recycling symbols—to prove that yes, this packaging or the product can be recycled, maintaining the sustainability factors.
- Country of origin—these signs are crucial, especially when it comes to customs regulations.
- Proper barcode placement for scanning—QR codes allow consumers to interact with the product and the brand easily.
All text must be clear, readable, and printed in a compliant font size according to local regulations. If the product is CBD and contains weed or marijuana legally or for health concerns, labeling requirements become stricter and vary by country or state. You may need to include:
- Accurate CBD content (e.g., mg per serving and total mg)
- THC percentage disclosure
- Batch or lot number for traceability
- Manufacturing and expiration dates
- Third-party lab testing reference or QR code linking to lab reports
- Required regulatory disclaimers (such as “Not evaluated by…” depending on legislatures)
- Age restriction statements were required
Brands, when selling sensitive products in CBD boxes, must avoid unverified claims that may cause confusion and affect health. Always confirm local compliance rules before printing because the regulations for CBD products change more often.
2. Shipping and Storage Considerations
Before giving the green light on the final structure, think beyond appearance and consider logistics as well. Packaging must perform well not only on the shelves but also in warehouses. It means that it should prove itself when stored in bulk quantities, placed on a shelf, or going to its destination.
Start by evaluating whether the boxes can be stacked safely without collapsing. Stacking strength is especially important for corrugated and bulk shipments. If boxes cannot properly support the weight, products may be damaged before reaching customers.
Next, assess compression resistance. Will the box maintain its shape under pressure during transport? The material thickness and flute type play a major role here.
Assembling the boxes is another practical factor. Boxes should be easy to fold, lock, or glue without slowing down the packaging operations. Complicated structures can increase labor time and costs.
Finally, review shipping efficiency, including what your package will encounter. For instance, oversized packaging increases dimensional weight charges, while proper sizing reduces costs and storage space. A well-designed box balances protection, ease of handling, and cost-effectiveness.
Phase 6: Prototype and Testing
1. Create a Sample Prototype
Requesting a sample prototype before moving into full production is like testing the packaging, which has always been a good idea.
This step helps you identify structural or visual issues early, when changes are still affordable and manageable.
You can start with a 3D preview, which gives a visual representation of how the artwork wraps around the box or how the box will look from every side.
It’s useful for reviewing layout, color balance, and placement. However, a physical sample is strongly recommended because it allows you to test real dimensions, material strength, and overall feel.
During testing, check whether the product fits perfectly inside without forcing or shifting. Evaluate if the box feels sturdy enough for handling and shipping. Also, review how the design looks in real lighting conditions, not just on a screen.
Prototyping reduces risk, improves accuracy, and ensures the final production run meets expectations.
2. Final Approval Checklist
Before sending the packaging to mass production, take time to verify every critical detail. This step prevents costly errors and ensures everyone involved is aligned.
Confirm that the dimensions fully match the tested prototype. Recheck that the artwork is finalized with no pending edits or elements that need to be replaced. Also, make sure colors are confirmed, especially if you have worked with RGB or Pantone shades.
Verify that all finishes are locked in, including lamination, foil, embossing, or spot UV. Ensure the material and thickness are selected exactly as documented.
Written approval from the client or decision-maker should be secured before production begins. This creates accountability and avoids misunderstandings once manufacturing starts.
Phase 7: Production, Quality Control, & Budget
1. Cost Estimation
Before moving to production, reviewing the packaging costs is crucial. Small changes in materials, finishes, or custom sizing can quickly increase expenses, so a clear budget check helps avoid surprises.
- Material costs—board type, thickness, coatings, and lamination options
- Finishing costs—foil stamping, embossing, spot UV, or other special effects
- Inserts and protective elements—foam, cardboard dividers, molded pulp trays
- Custom tooling—Die-cut tools or specialized assembly requirements
- Order volume impact—Bulk orders may reduce unit cost, while small runs can be more expensive
Reviewing these points ensures the packaging is high-quality, functional, and cost-effective, keeping the project on track financially while maintaining design standards.
2. Send to Production
Once everything is approved, the project moves into production. At this stage, clarity and documentation are critical. The manufacturer should receive complete and accurate files to avoid delays or costly mistakes.
Provide the final die-line with clearly marked cut and crease lines. Share the print-ready artwork in the correct format, ensuring fonts are outlined, and colors are properly set in CMYK or Pantone if required. Include detailed material specifications, mentioning board type, thickness, and any special structural notes.
Also attach clear finishing instructions, specifying lamination type, foil areas, embossing locations, or spot UV placements.
When all production files are organized and communicated clearly, manufacturing runs more smoothly and reduces the risk of reprints or structural issues.
3. Quality Check After Production
Production does not end when the boxes are delivered. A proper inspection ensures that what was approved is exactly what was manufactured.
Start by reviewing the print quality. Check for smudges, blurred text, uneven ink coverage, or registration issues. Text and graphics should appear sharp and clean.
Next, verify color accuracy. Compare the finished boxes with approved proofs or Pantone references to ensure brand colors are consistent and not overly dark, faded, or shifted.
Examine cut precision by checking edges, folds, and alignment. Die-cuts should be clean, crease lines should fold smoothly, and panels should align properly when assembled.
Finally, test the structural strength. Assemble a few boxes, place the product inside, and evaluate durability under light pressure or stacking. The box should hold its shape and protect the product as intended.
If any issues appear, communicate them immediately to the manufacturer before distribution.
Final Thoughts!
Designing packaging can be overwhelming, especially when there are too many steps to manage at once. It required planning, precision, and coordination.
It begins with defining the purpose and understanding the product’s exact requirements. From there, structural decisions such as box dimensions, material selection, and die-line preparation create the technical base.
Visual elements, including layout, colors, and print methods, bring the design to life, while finishes and inserts enhance both protection and presentation.
Compliance checks ensure all legal requirements are fulfilled, while practical considerations address shipping, storage, and assembly efficiency.
Prototyping allows testing before mass production, followed by final approvals to prevent massive errors. Once in production, quality control verifies print accuracy, structural strength, and consistency. When everything is approached step by step, you take control over your packaging design.
