


Screen Printing is known to be the heart and soul of the bulk printing operations. This printing technique dates back to the 18th century. It was in the 19th century that technology became popular and was adopted across various industries, including retail and electronics, due to the customization options it offered.
In this blog post, we will delve into what screen printing is, how it works, and the benefits it offers.
Let’s dig in!
What is Screen Printing?
Screen printing is also known as serigraphy or silkscreen printing. It is a versatile process of printing small or moderate volumes of packaging, labels, garments, and other products. It is done by pushing ink through a stenciled mesh screen to create a printed design on a material. With this printing technique, you can print a variety of ink types on any material, including paper, cardboard, rigid materials, fabrics, metals, plastic, glass, ceramics, and more.
How Does It Work?
Screen printing can be done by using a machine or by hand, but the process always stays the same. The only difference that can occur is the type of ink used in the printing process.

Below is the step-by-step procedure of how screen printing works:
Step 1 → Design Creation
The first step is to create a design that you want to print through screen printing. When you have your design ready and decided upon, it gets printed onto a transparent acetate film. That will later be used to create screens or stencils.
Step 2 → Selecting & Preparing Screen
Once your design is ready, the next step is to choose the right screen and mesh count. You might wonder what mesh count is. It is the number of threads in one square inch of the screen. The mesh count you pick totally depends on the design you want to print.
If you are looking for finer details in your design, it is recommended to have a higher mesh count. However, if you choose a lower mesh count, it will allow ink to flow through the gaps, which works well for simpler or bold designs.
Once you have selected mesh, the screen gets coated with emulsions. There are three emulsion types:
- Diazo: It’s affordable but takes longer to expose and doesn’t handle detailed work well.
- SBQ: It cures quickly and produces perfectly detailed designs. It’s expensive than others.
- Dual Cure: It is a mixture of both Diazo and SBQ. It’s cheaper than SBQ, but more effective than Diazo.
Step 3 → Exposing Emulsion
Now, you have to place your transparent acetate film with the design onto the emulsion-coated screen. This part needs to be done under a bright light. The light will help to harden the exposed areas of the emulsion. The soft areas will later get washed out to reveal your design.
Step 4 → Creating The Stencil
After exposure, the screen is rinsed to remove the unhardened emulsions, leaving your design clearly visible. Once it’s done, it gets dried and touched up to make sure it’s as close to the original artwork as possible.
Now your stencil is ready for use for printing.
Step 5 → Printing Preparation
At this stage, the material to be printed is placed flat on the printing board. The screen is then positioned carefully over the material, aligned exactly where the design needs to appear.
Please note that proper placement is required for more accurate results.
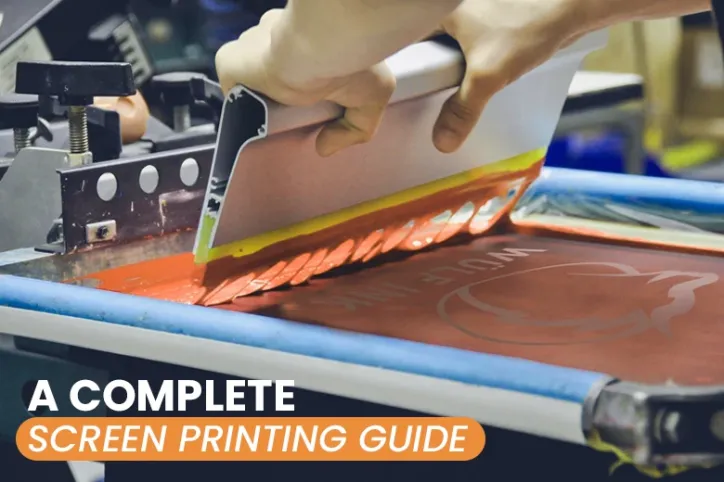
Step 6 → Applying the Design
With the screen in place, the selected ink color is added to the top of the screen. A squeegee is used to spread the ink evenly across the screen, pressing it through the open areas of the stencil. This transfers the design onto the material beneath.
Once the printing is complete, the stencil has served its purpose. The screen is then cleaned using a special washing fluid to remove the emulsion, allowing the mesh to be reused for future designs.
Step 7 → Heat Curing & Finishing
The final step is heat curing. The printed item passes through a dryer, which cures the ink immediately and ensures the design is fully set. This process helps prevent fading and keeps the print durable over time.
Types of Silk Screen Printing
When it comes to silk screen printing, there are a total of six types. Here are the types of silk screen printing
1. Spot Color Screen Printing
It is the most commonly used screen printing method. Spot color screen printing involves a solid block of individual colors, with each color requiring its own screen. This method is ideal for simple designs with limited colors, such as logos, graphics, and text. It’s also a budget-friendly option for bulk printing.
2. Grayscale Printing
Gray scale printing focuses on different tones of a single color. It creates a smooth transition from light to dark, which helps reduce photographic or shaded artwork. This method is great for designs that require depth and texture without using full color. It gives a more dramatic and artistic look. The key to clean grayscale printing lies in the right mesh count and emulsion technique.
3. Halftone Printing
This printing method uses tiny dots to simulate continuous tones. It is perfect for converting detailed images into a single-color format while still preserving depth. It is mostly used for printing posters, vintage-style graphics, or t-shirts. This printing method is perfect if you are working with photo-based designs.
4. CMYK (4-color screen printing)
CMYK offers four color spectrums, such as cyan, magenta, yellow, and key (black) to recreate the full-color images through careful layering. This method is perfect for designs with gradients, shadows, and multiple tones. CMYK screen printing is more technical than spot color and requires precise registration for clean results. It’s worth noting that offset printing also utilizes the same CMYK color model, but is typically employed for paper-based materials such as brochures, packaging, and catalogs, where fine detail is required.
5. Duotone Screen Printing
Duotone printing gives your design a creative edge by blending two different ink colors. Typically used for photographs, this technique creates an expressive, layered effect that stands out. First, the image is converted into black and white, and then split across two screens, each holding one of the chosen colors.
6. Simulated Process Printing
It combines elements of spot color and CMYK to achieve custom prints. Instead of using four process colors, it uses select spot colors to recreate complex images. However, it does not require an expert color-separate and screen setup.
Benefits of Silk Screen Printing
Silk screen printing offers numerous benefits, particularly when you require vibrant colors that last. Some of the key benefits include:
- Bright and long-lasting colors: It offers a bright and long-lasting color spectrum that gives custom boxes, posters, garments, and more a lasting look.
- Range of Materials: Another significant benefit of screen printing is its versatility, which allows it to be applied to a wide range of materials, including fabric, paperboard, plastic, and more.
- Clean Result: Although this printing technique takes significantly more time than others, it provides crisp, clean results on the printed material.
With all these benefits, silk screen printing remains a top choice for printing companies.
Ready to Get Started With Your Printing Project?
If you’re looking for vibrant, durable prints across different materials, screen printing is worth considering. It may take more setup time, but the results speak for themselves. For custom packaging or apparel, this method delivers consistency and quality. Just ensure that your design and mesh count align with your goals.


